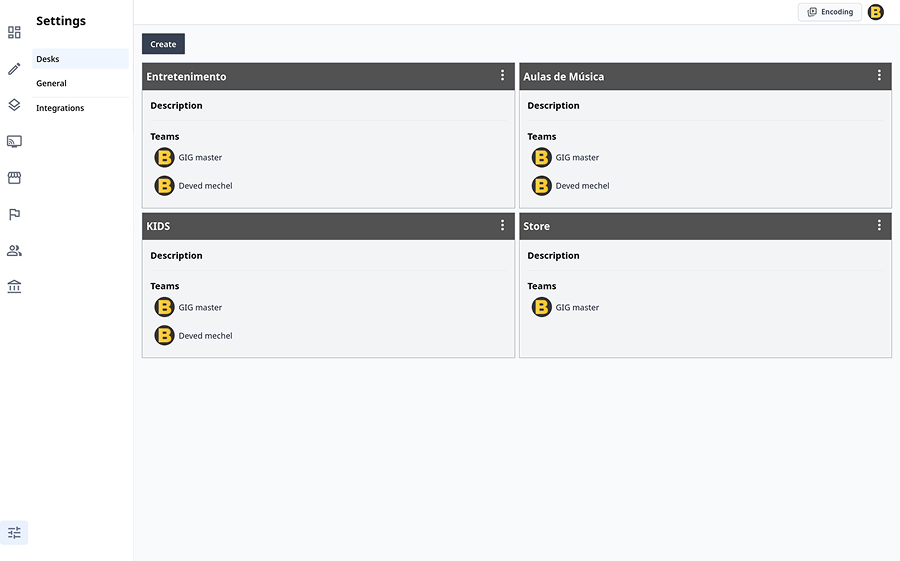
Step 1: Create Desks for Content Organization
After launching your CMS, start by creating desks to organize content, as shown in the image "cms-desks-setup.jpg". Desks help categorize content for different teams, such as Kids, Movies, and Series. Each desk can have optional stages (e.g., Working Stage, Under Review) to manage the publishing workflow. For example, the "Entretenimento" desk can be assigned to the Movies team, while "Kids" can be assigned to the Kids team. This organization ensures each team works on their specific content categories efficiently.
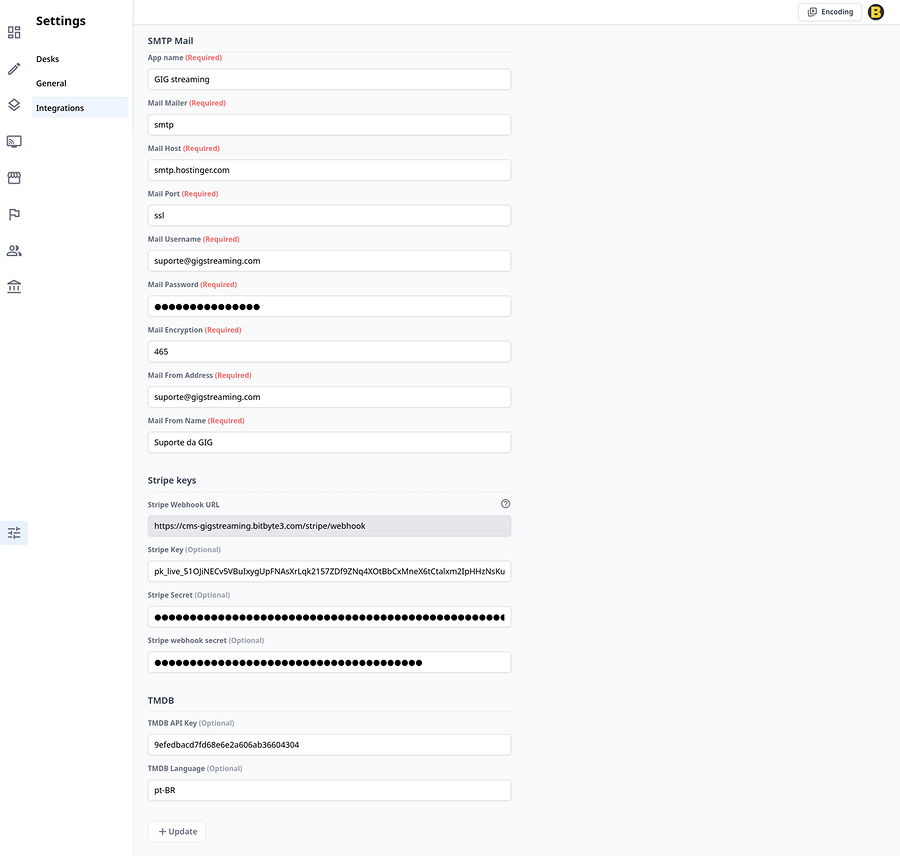
Step 2: Configure Integrations in Settings
Navigate to the Settings section and set up integrations like SMTP, TMDB, and Stripe, as shown in the image "cms-settings-integrations.jpg". These integrations are crucial for functionality:
- SMTP Mail: Configure email settings (e.g., Mail Host, Username, Password) for notifications. This is required.
- TMDB: Add a TMDB API key (optional) to fetch movie and TV show metadata.
- Stripe: Set up Stripe Webhook URL and API keys (required) for payment processing. This enables secure transactions for monetized content.
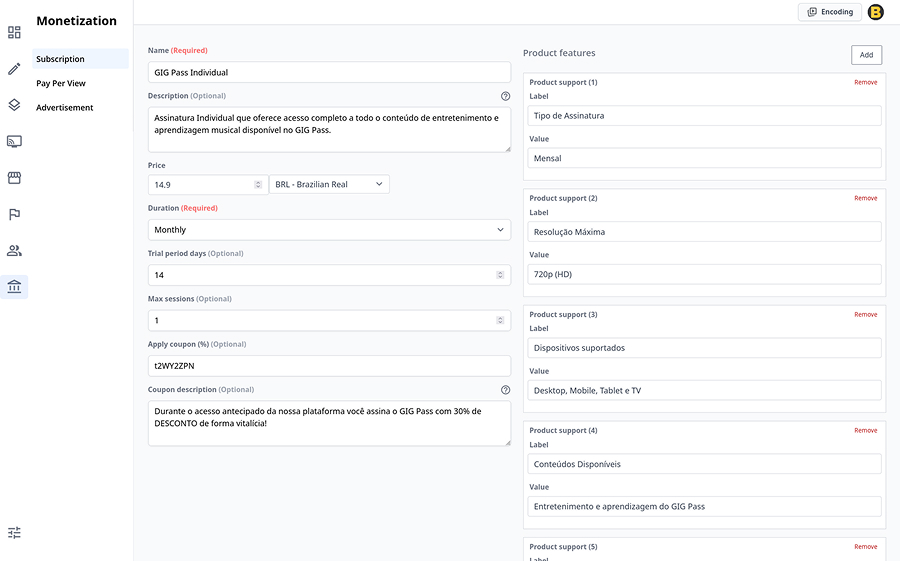
Step 3: Create Monetization Plans (SVOD)
Go to the Monetization section to create Subscription Video on Demand (SVOD) plans, as shown in the image "cms-monetization-plan.jpg". For example, create a plan named "GIG Pass Individual":
- Name: GIG Pass Individual (required).
- Description: "Assinatura Individual que oferece acesso completo a todo o conteúdo de entretenimento e aprendizado musical disponível no GIG Pass" (optional).
- Price: 14.9 BRL/month (required).
- Duration: Monthly (required).
- Trial Period Days: 14 (optional).
- Max Sessions: 1 (optional).
- Apply Coupon: e.g., "t2wyz2pn" for a 30% discount (optional). Add product features like "Resolução Máxima: 720p (HD)" and "Dispositivos Suportados: Desktop, Mobile, Tablet e TV" to enhance the plan's appeal.
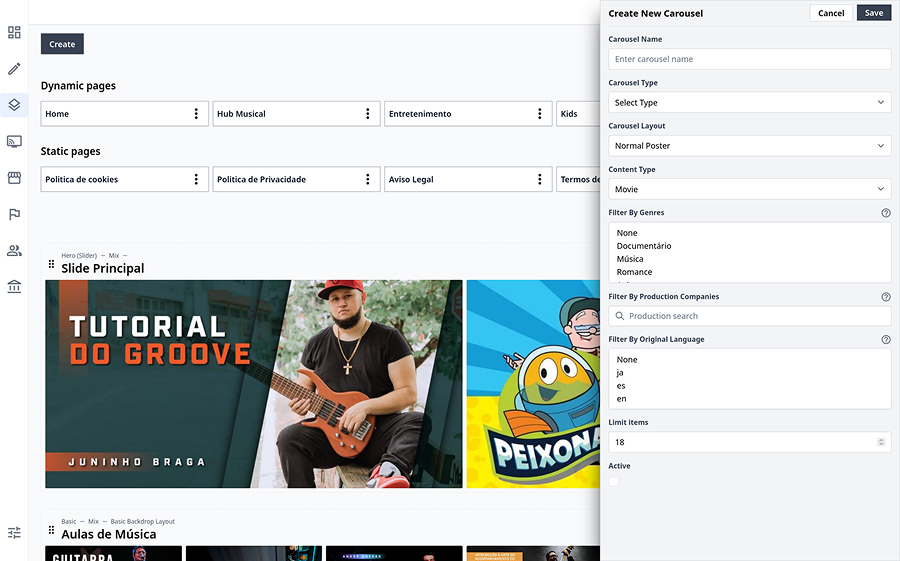
Step 4: Create Dynamic and Static Pages
In the Pages section, create dynamic and static pages, as shown in the image "cms-dynamic-pages.jpg".
- Dynamic Pages: Create pages like "Entretenimento" with multiple carousels. Filter content by:
- Year: e.g., 2023.
- Content Type: e.g., Movie, Series.
- Genre: e.g., Documentário, Música, Romance. Use layouts like Basic Poster Layout or Basic Backdrop Layout to display content, as seen in the "Slide Principal" and "Aulas de Música" carousels.
- Static Pages: Create informational pages like "Política de Cookies" and "Aviso Legal" for website policies and contacts. These pages provide essential information to end users.
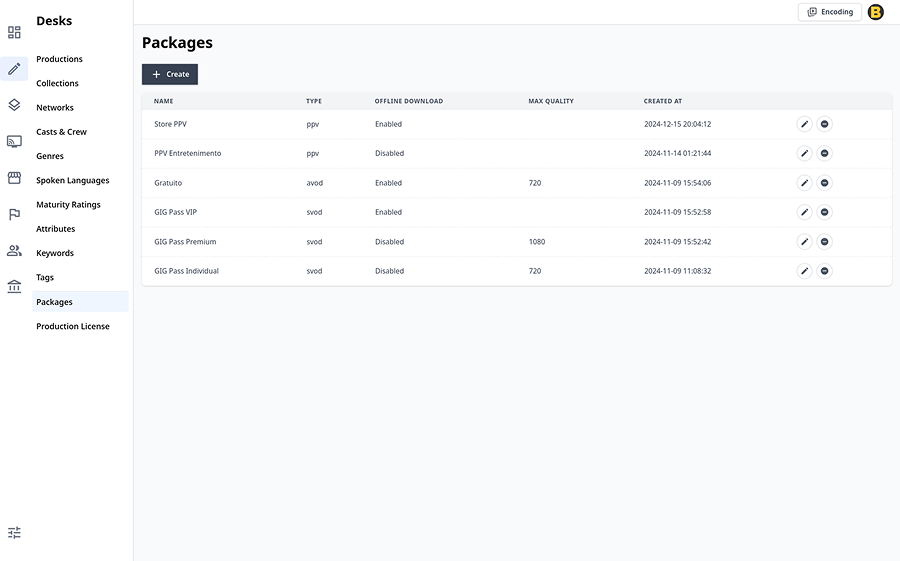
Step 5: Create Packages for Content
In the Packages section, create packages related to SVOD, AVOD, and PPV, as shown in the image "cms-packages.jpg". For example:
- SVOD: "GIG Pass VIP" with offline download enabled and max quality of 1080p.
- AVOD: "Gratuito" with offline download enabled and max quality of 720p.
- PPV: "Store PPV" with offline download enabled. When publishing content, assign the appropriate package (e.g., GIG Pass VIP for premium content) to define access and monetization rules.
Conclusion
Setting up your CMS with desks, integrations, monetization plans, pages, and packages streamlines content publishing and enhances user experience. Desks organize content for teams, ensuring efficient workflows for categories like Kids and Movies. Integrations like SMTP and Stripe (required) enable essential functionalities, while TMDB (optional) simplifies metadata retrieval. SVOD plans with optional features like trial periods and coupons provide flexibility for monetization. Dynamic pages with carousels filtered by year, content type, and genre, alongside static pages for policies, cater to both user engagement and informational needs. Finally, packages (SVOD, AVOD, PPV) allow precise control over content access. This structured approach benefits end users by offering a seamless, organized, and monetized content experience tailored to their preferences.